The command saber build creates a public directory with a production build of your app. Set up your favorite HTTP server to properly serve static .html files and other static assets.
Built-in Static Server
You can use the built-in static server via the saber serve command, it automatically serves the public directory:
cd my-site
yarn saber build
yarn saber serve
This is great for previewing the production build locally.
Other Solutions
You don't need the built-in static server in order to serve a Saber application, it works just fine with most static servers, for example you can use sirv-cli:
npx sirv-cli publicOr serve:
npx serve publicBuilding for Relative Paths
By default, Saber produces a build assuming your app is hosted at the server root.
To override this, specify the build.publicUrl in your Saber config file, for example:
// saber.config.js
module.exports = {
  build: {
    publicUrl: '/blog/'
  }
}Netlify
To setup continuous delivery:
With this setup Netlify will build and deploy when you push to git or open a pull request:
- Start a new netlify project
- Pick your Git hosting service and select your repository
- Click
Build your site
Since Netlify automatically rewrites routes like /foo to /foo.html when /foo doesn't exist, you may need saber-plugin-netlify-redirect to fix this.
GitHub Pages
Step 1: Install gh-pages and add deploy to scripts in package.json
npm i -D gh-pagesAlternatively you may use yarn:
yarn add gh-pages --devAdd the following scripts in your package.json:
  "scripts": {
+   "predeploy": "npm run build",
+   "deploy": "gh-pages -d public -t",
    "dev": "saber",
    "build": "saber build",
Step 2: Add .nojekyll to turn off Jekyll
Adding a file .nojekyll (with empty content) to the static/ folder to turn off Jekyll integration of GitHub Pages.
Step 3: Optionally, configure the domain or repository path
If you are using a custom domain, you can configure it with GitHub Pages by adding a CNAME file to the static/ folder.
Your CNAME file should look like this:
mywebsite.comIf you are using a repository-level gh-pages deployment ([username].github.io/[repository name]), set the publicUrl property in the Saber configuration file. This is not required for account-level gh-pages deployments ([username].github.io).
Step 4: Deploy the site by running npm run deploy
Then run:
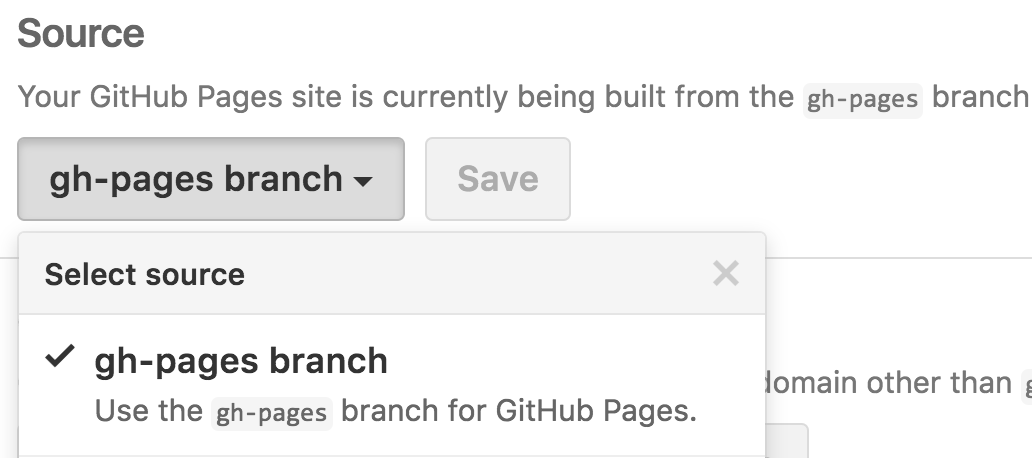
npm run deploy Step 5: For a project page, ensure your project’s settings use gh-pages
Finally, make sure GitHub Pages option in your GitHub project settings is set to use the gh-pages branch:
ZEIT Now
Now offers a simple, single-command deployment. You can use now to deploy your app for free.
Now has been optimized for Saber, so the only thing you need to do is to install Now. You can do this by installing the Now Desktop app, which also installs Now CLI and keeps it up-to-date, or by installing Now CLI directly with npm:
npm i -g nowThen run the command now in your project, you will be given a now.sh URL as a response as your build is deployed, similar to the following: https://my-saber-app-dxcikdrgk.now.sh/. Click or paste the deployment URL into your browser and you will see your deployed app.
Check out Now for GitHub and Now for GitLab for continuous intergration.
Firebase
To host and deploy your site to Firebase.
Step 1: Create a new web app and select "Also setup Firebase Hosting for this app"
Step 2: Add the required Firebase scripts to the body of your site
// saber.browser.js
export default ({
  setHead
}) => {
  setHead({
      script: [{
        src: '/__/firebase/6.6.1/firebase-app.js',
        body: true
      },
      {
        src: '/__/firebase/init.js',
        body: true
      }
    ]
  })
}Step 3: Install the Firebase CLI, login and create a firebase config in the root of your project.
npm install -g firebase-tools # Install the CLI
firebase login # This will open a new browser window follow the instructions
firebase init # Follow the instructions, choose the hosting option Step 4: Add the following script in your package.json:
  "scripts": {
    "dev": "saber",
    "build": "saber build",
+   "deploy": "npm run build && firebase deploy"
Deploy your site
npm run deployStep 5: To configure firebase to strip trailing slash (Optional)
Add "trailingSlash: false to your firebase.json config.
// firebase.json example
{
  "hosting": {
    "public": "public",
    "cleanUrls": true,
    "trailingSlash": false,
    "ignore": [
      "firebase.json",
      "**/.*",
      "**/node_modules/**"
    ]
  }
}Docker
[TODO]
PR welcome for using a docker image to build and serve your Saber application.